Monday, December 17, 2007

Hand-dyed Baubles

I had fun making these!! They were made from Tyvek envelopes that you can get from the postal service. I painted the white part of the envelope (the inside) with the same dyes I use on fabric. I wasn't sure if the dye was going to "stick" since Tyvek is a synthetic material made of high density polyethylene fibers. It did soak into the material a little bit (not much) & the rest dried upon the surface. After the dyes had dried, I sealed it with Mod Podge. I then rubber stamped some with Lumiere paint. After all was dry, I then added dyed threads to some & then wrapped the colored Tyvek around a metal screwdriver. Since I had plans to use my heat gun on the beads, the handle on the screw driver gave me something to hold onto while I applied the heat. (make sure you do this in a well ventilated area & wear a mask, you're pretty much melting plastic, so you don't need to be inhaling noxious fumes)

After the piece was "melted" to my satisfaction, since the metal on the screw driver was still hot, I slid the beads off with a pair of tweezers. You could, however, wait for the piece to cool before you remove it, but I was having so much fun, I didn't have the patience to wait.

Thursday, December 13, 2007

Merry Christmas to me!!


Aren't these wonderful?! The two bracelet pictures are of the same bracelet, I just wanted you to be able to see both sides of all of the caps. These came from a good friend of mine, Michelle. Some of her many artistic talents are creating beautiful bottlecap jewelry (& the dyed socks pictured below). We swap all different kinds of things from time to time. I sent her around 200-225 bottlecaps (I don't think I want to share with you how I acquired them, but I will just say that I've been collecting them since last summer). I just hated throwing away those little pieces of "art" but had no idea what to do with them, so when Michelle told me that she'd happily take them off my hands, I was happy to oblige. Aren't they just fabulous?!!!


Michelle & I recently joined a group called DyeHard_RunOff. This group is terrific. It's a great group for beginning dyers just starting off & also, I think for dyers, like me, who have been dyeing all kinds of fabrics for many years. It's a group, where each member in the swap will chose colors from Procion MX dyes & do color runs like make brown or gradations of purple, etc. We then create, what I call recipe cards & attach the swatches to each matching card. We send a set of them off to each member in the swap which then builds upon a little "recipe book" of dyes for each member. This is how I was taught many years ago when taking dye classes in college, so when Michelle told me about this group, I thought what a great group to join, maybe I could really learn a lot. The ladies in this group have also done dye runs of flour sack towels & socks like the ones Michelle sent me below. I just LOVE the colors!! I can't wait until spring when I can wear shorts and capris & show off my cool socks!!! (You can check out Michelle's site here to see some of the other cool socks she has dyed.)

Tuesday, December 11, 2007

Traditional Quilt Block with a Modern Twist


I created these 6"x6" blocks for a swap in Surface Design. We were to create a traditional quilt block & add a modern twist. The name of this block is called "Fair & Square". I rubber stamped with Lumiere paint & then layered dyed cheesecloth over the rectangular blocks & the center square block. The solid "red-salmony" areas (the triangles & the 4 corner squares) I heavily stitched the fabric to give it some texture. Unfortunately, it's a little difficult to see what I did in the blocks. I then finished off the pieces by adding some hand dyed toilet tissue stamps to help give it that modern twist.


I handled the backs a little different on each piece (to help hide the quilting). I don't mind quilting, but I think it's the one thing I like least when putting a piece together. I love the designing, dyeing and sewing the piece together but then comes the part, "you mean I have to quilt it too?" Seems like quilting is always an afterthought & I need to start incorporating that into the idea when I first start a piece.

With the salmony piece, I carried the Lumiere paint rubber stamping onto the back of the piece & then layered the hand dyed cheesecloth. The neon green piece, I just added the dyed cheesecloth & the purple piece (which I didn't enclose a photo of the back), I was happy with how the stitches turned out & since the backing had a little bit of the shibori tie & dye on it, I left the purple backing alone.

I'm really surprised that I drug my feet so much when making these, because I have to say, I really liked how they turned out.

Thursday, December 6, 2007

Flooding, What a Mess!

We had 3 storm fronts come through this past weekend. We had our first snow of the year, December 1st (normally the snow stays up in the mountains), but at least once a year, it decides to come down into the lowlands and wreck havoc for a day or two. December 2nd & 3rd it snowed early in the morning on the 2nd & by noon it downpoured the rest of the day, into the night and as well on the 3rd all day and WHAT A MESS!!

I've attached some photos so you can see the after math. (I'm not sure if they've ever said how many inches we did receive.) My neighborhood was lucky we didn't see any flash flooding but a lot of other neighborhoods weren't so lucky. One of the towns, nearby, where we do a lot of our shopping and dining, they had over 14 roads closed at one time and the main highway to get into that town, part of road had washed away. I saw areas flooded that I had no idea that water could even reach. Most of the photos below are from the area of Chehalis, Washington, where most of the damage was done.

The photos with the semi trucks sitting on the overpass are stuck there until the river goes back down, since both ends of Interstate 5 in that area are covered with over 10 feet of water (we just got news today-Thursday- that they hope the have that part of Interstate 5 opened back up by tonite). They say the trucking industry is losing over $4 million dollars a day since they cannot move their loads up and down Interstate 5. The problem is, there are not really any other roads to get to and from Portland to Seattle except by going 400 miles out of the way and heading over to eastern Washington and then coming back over to the western side. The second to last photo is of the town that I mentioned above that had over 14 roads closed. I have lived in this area for over 10 years and had no idea that little creek was even there. Apparently that day, it decided it wanted to be noticed. (We were lucky in that there weren't many fatalities).

Tuesday, December 4, 2007

Christmas Goodies

One of my artist friends told me about this site:

2007 Calendar Countdown

You need to check it out, she's sharing a lot of really cool "crafting paper surprises" each day during the Christmas month. (kinda like the 25 days of Christmas)

Monday, December 3, 2007

Scarves


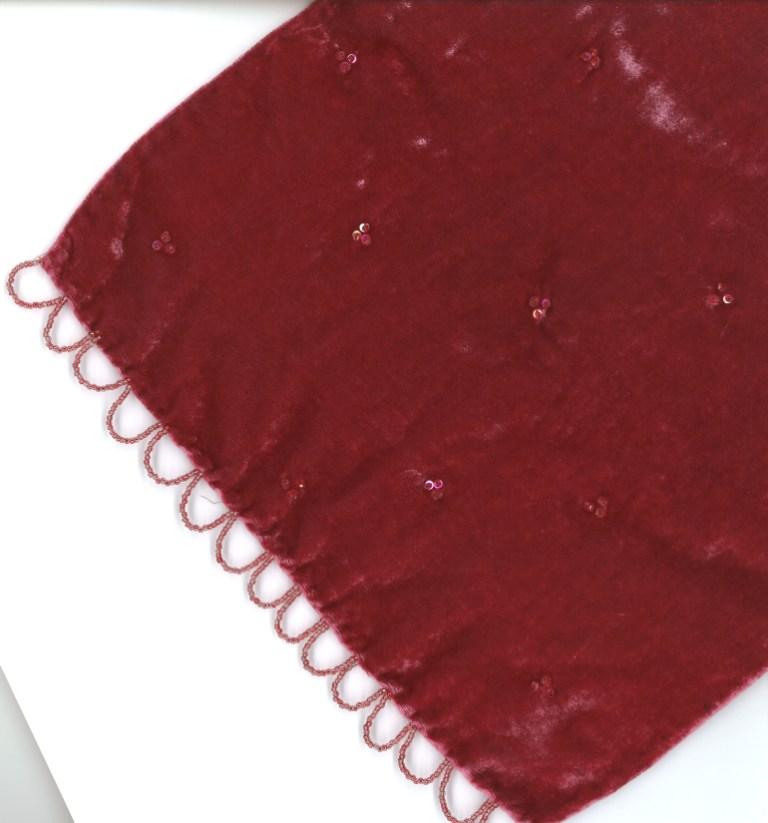
First of all I apologize for the color in the some of these photos. As some of you may know, with velvet, how light hits & bounces off the fabric is what gives it its nice "shiny" appearance. Velvet does not like to photograph very well but I think I got as close as I could to the true colors.

I've been hand dyeing some scarves lately (they make really nice Christmas presents). The dusty rose one above was my first attempt at making beaded fringe. (I'm not sure I'll do that again.)

The velvet scarf below, turned out a beautiful vibrant red. Unfortunately, the flash didn't pick up the rubber stamped star bursts that I stamped in white.


This velvet scarf, below, was hand dyed a really nice purple. I then rubber stamped it & did some beading & added sequins. (I like how the fringe turned out a lighter tone from the scarf).


This last scarf is made from silk. I rubber stamped it & added beads and sequins as well. I also dyed two other silk scarves over the weekend that turned out the MOST beautiful brown & burgundy (yes I finally achieved a nice brown). Sorry they're not pictured here, but I haven't had a chance to do anything else to them but dye them.


Wednesday, November 28, 2007

Who says Engineers can't be Artists?

My husband, the engineer created these wooden pendants. This photo does NOT do them justice!! They're absolutely gorgeous (if I do say so myself). They're about the size of the pad of your thumb. The one of the left is made from ebony, quilted maple and African bloodwood. The center piece is quilted maple and lacewood. The third is from African bloodwood, quilted maple & a rosewood. Wished you could feel these. With the natural oils in some of these woods and the polish that was added to protect the pieces, they're SO smooth.

The pieces below were a joint effort of Daryl's & mine. One day when he was creating some wooden boxes, I mentioned how cool it wood be to make a polka box from wood. Rolling his eyes and shaking his head (I'm sure there are a few of you out there that has a husband that does this when you mention some crazy idea) he says, if you want a polka dot box, I'll make the box for you but you're doing the polka dots. I think they turned out pretty well!!

(yeah, the triangle shaped box was my idea & I added little wooden polka dots for the feet to raise the box up just a little from the ground)